
Check out the video of the whole process!
Since before I got myself a DIY 3D printer I knew I wanted to print out a Rubik’s cube mod with it. My previous mods had taken a lot of cutting, sanding and sweating – so the prospect of designing my own cube with a 3D modeling software and just printing it out was great.
Before designing my own cubes, I thought I should print out a basic 3x3x3 cube first, just to get the feel of it. There were two cubes on thingiverse already. One is qijie’s GEB cube printable in one piece, which is awesome, but not printable with my Makerbot due to all the detail. The other one is Nudel_P’s cube, which seems like a usual cube with all its parts, but the screws stick out of the center pieces, which didn’t appeal to me. I thought of modifying it, but his original files were in some random software – that’s when I decided to design my own on OpenSCAD.
I started learning OpenSCAD in the past month, so this was also a good opportunity to learn and practice. I started designing the cube roughly based on a DIY Cube4you I have (mostly the size of the cube). To make it easily scalable, I made every measurement based on one variable, the length of a cubie’s edge. I thought it would be a waste of plastic to make a simple 3x3x3 cube with nothing special about it, so I had the idea of giving a different texture to each of its faces and make a cube for the blind (or the blindfolded with bad memory). This brings another reason for not having screws sticking out of the center pieces, I needed caps. So I thought of several ways to make printable centers with caps which would fit screws without needing to be drilled, but nothing seemed to work. That’s when I decided to get rid of the screws altogether.
I knew that no matter how well I designed the cube, with the resolution of my Makerbot, it would never be proper for speedcubing. This means I have less need for springs, I just need the cube to turn, even if with a bit of effort. Taking off the screws and springs also meant the cube would be fully printable (but not as a whole like qijie’s), so I’d have the chance to come up with something new. And here’s he result!
HOW TO MAKE IT
Tools:
- 3D printer
- super glue
- sandpaper
Parts to print (download from http://www.thingiverse.com/thing:9913):
- 1 corner with each pattern (8 in total; corners are printed at once)
- 1 edge outer part with each pattern (12 in total; each edge outer part will be glued to an edge inner part)
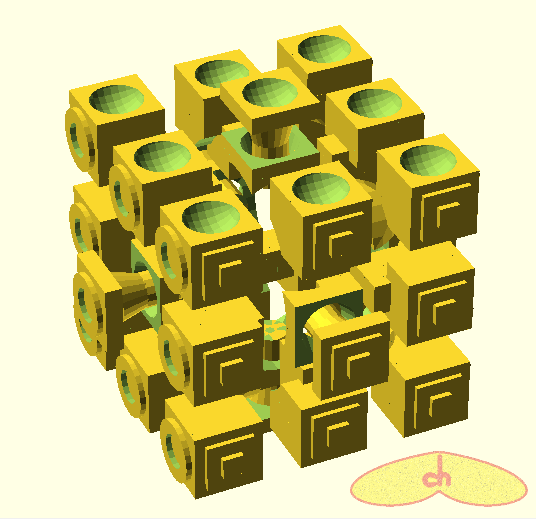
- 12 edge inner parts (all the same)
- 1 center outer part with each pattern (6 in total; each center outer part will be combined with a center inner part and a center core)
- 6 center inner parts (all the same)
- 6 center core parts (all the same)
- 1 core
Instructions:
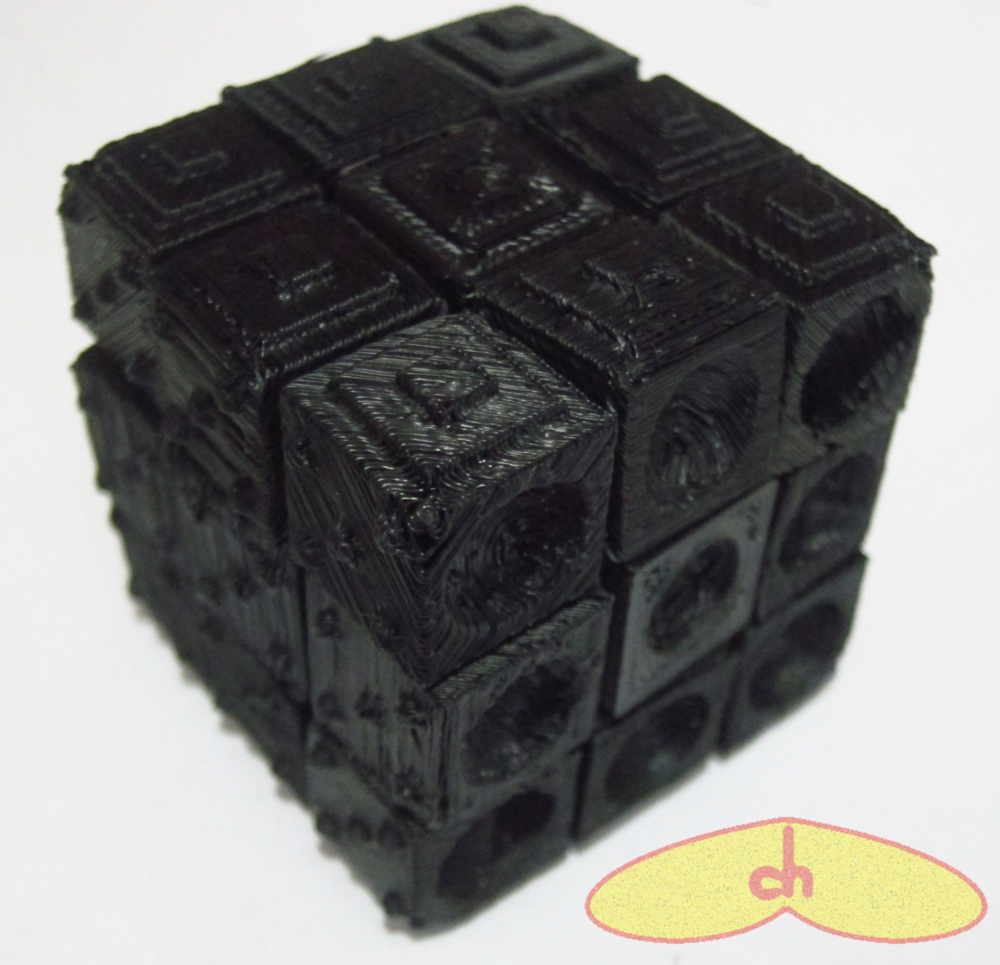
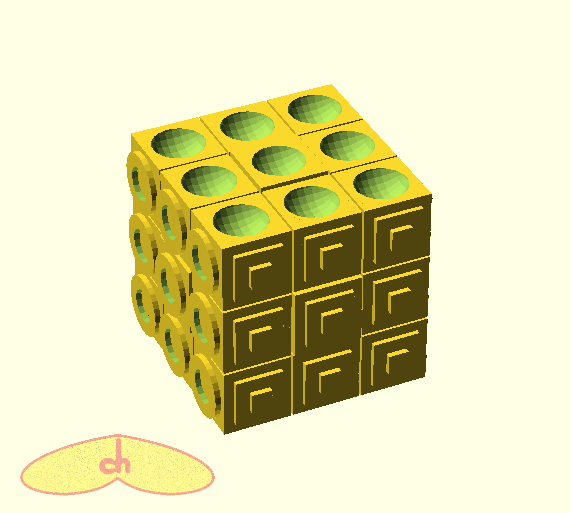
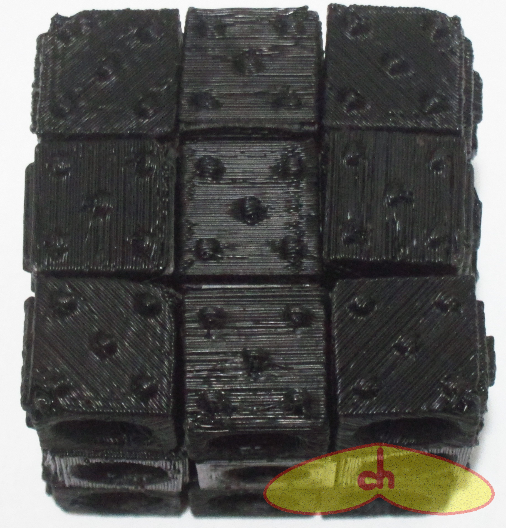
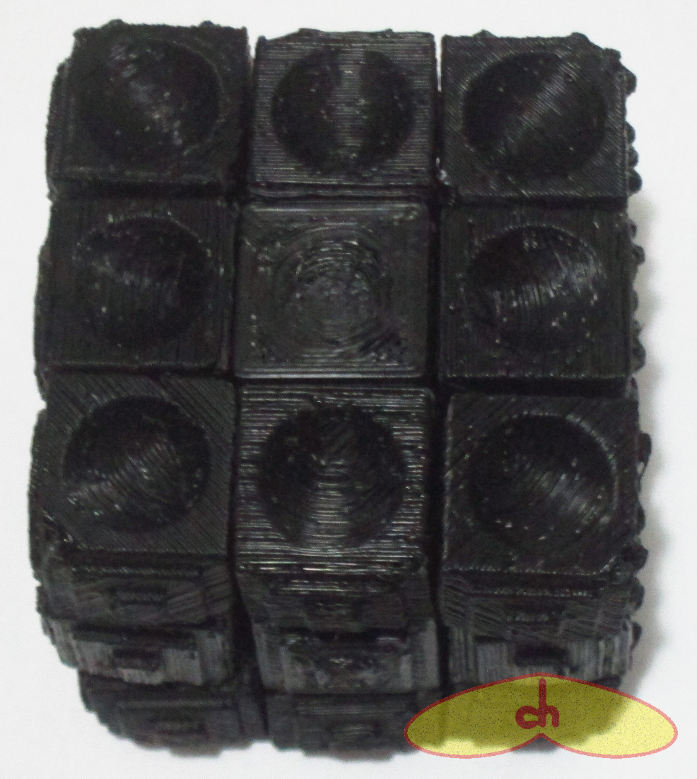
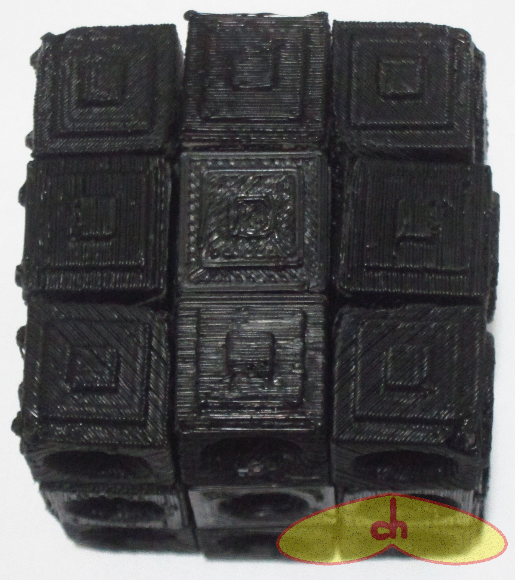
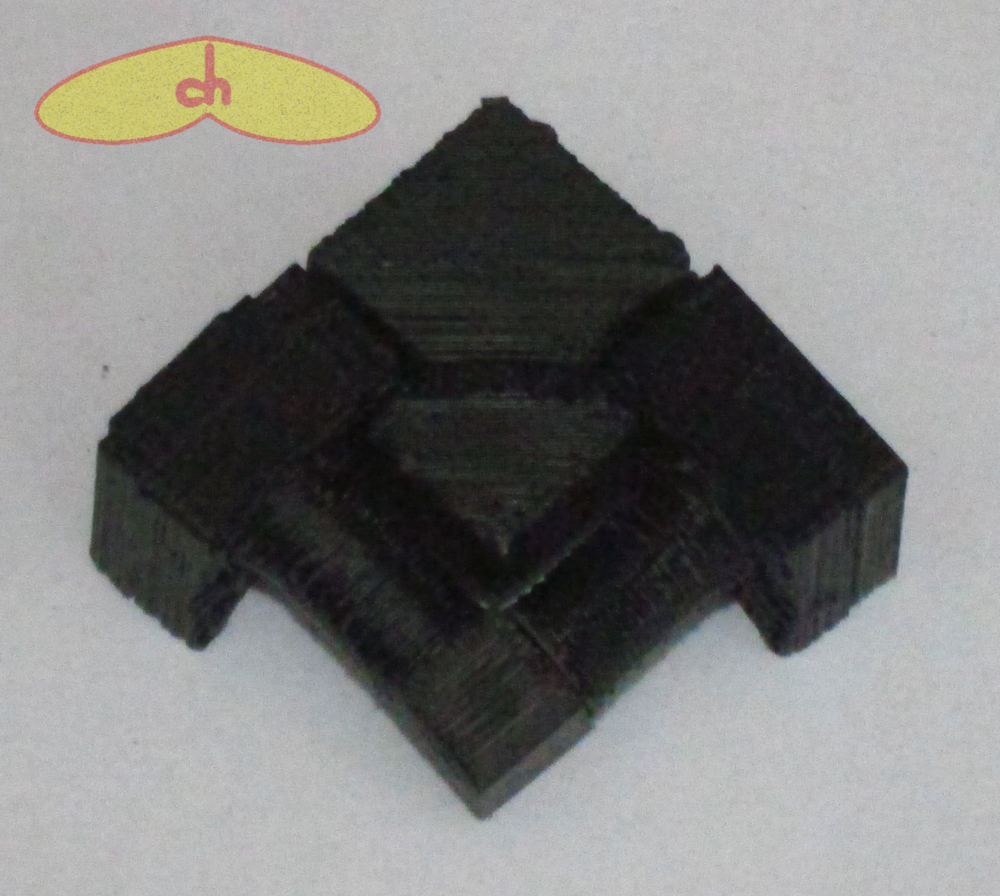
- The cube has the following 6 patterns on its faces: dots, stripes, plain, pyramid, circle and hole.

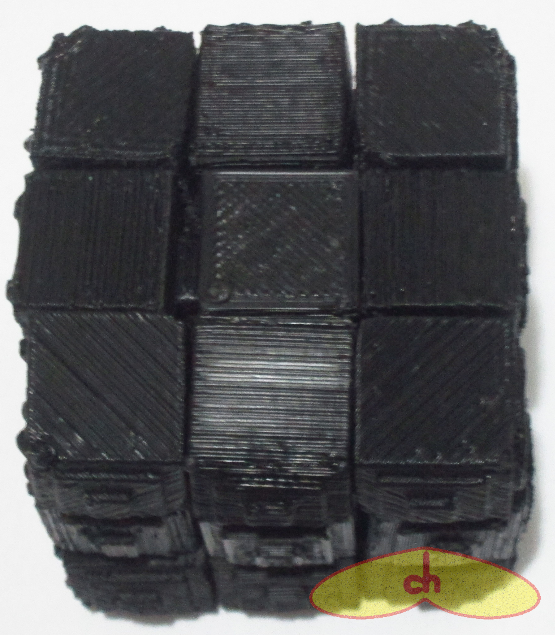

- Start by printing the corners, they are already properly patterned, so just print one of each and you’re done with the corners.

- Then let’s print the edges. I couldn’t find a way to print the edges at once like with the corners, so each edge is printed in two pieces. Print one of each edge outer piece, each one has 2 face patterns on them. Then print 12 edge inner parts. Now glue each inner and outer part, and you got your edges. (I suggest you sand with a rough sandpaper each surface which will be glued, so they adhere better)

- At this point I placed all my edges and corners on my C4U’s core to see if everything was ok. I checked the patterns and the way the pieces fit together. Now you’ll want to sand the parts of the pieces that touch each other so you can make the cube move more smoothly. They probably won’t get perfect, so be careful how much you are sanding or you might open holes on your pieces.

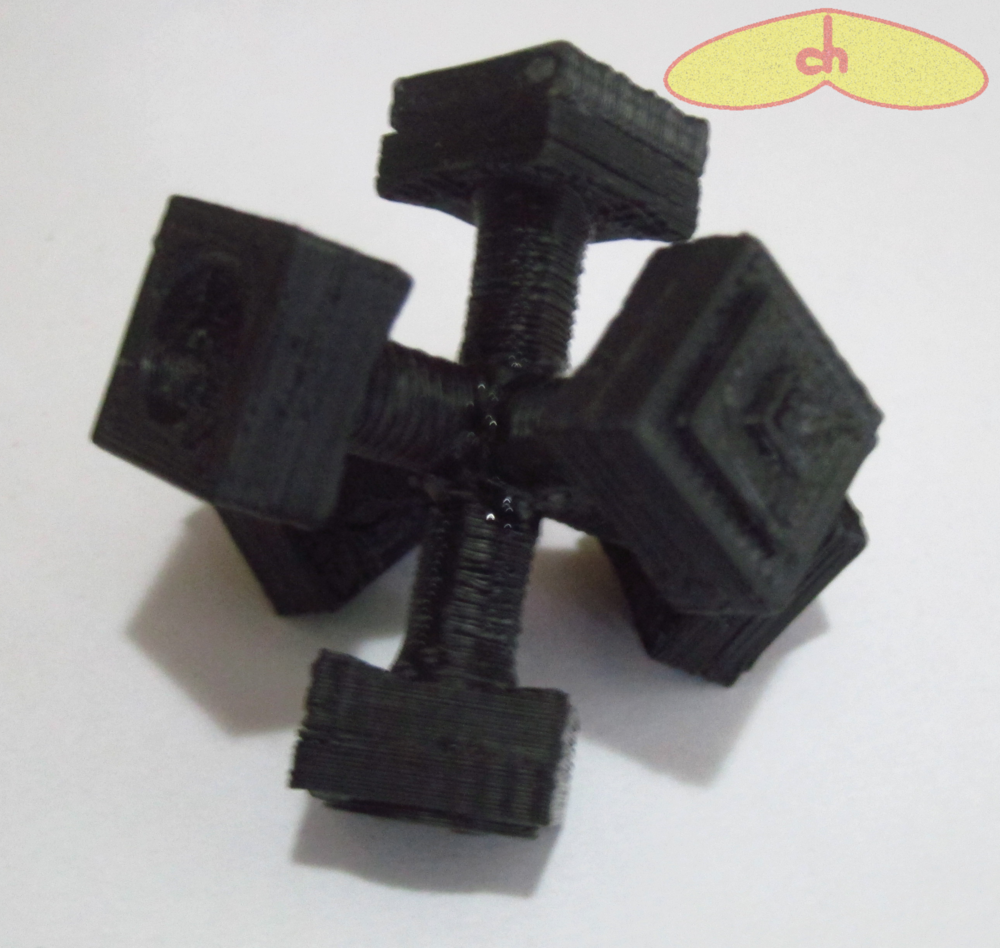
- Now to the centers. Each center piece is printed in 3 parts – outer, inner and core. Only the outer has patterns, so each one of the 6 outer centers will be different. Then print 6 center_inners and 6 center_cores. Not to need screws, this cube rotates with a cone inside a chamber. the chamber is formed by the inner and outer parts. Before assembling the centers, sand the surfaces which will touch others, especially the inside walls of the hole on the inner part and the (head) of the core so they slide better against each other.
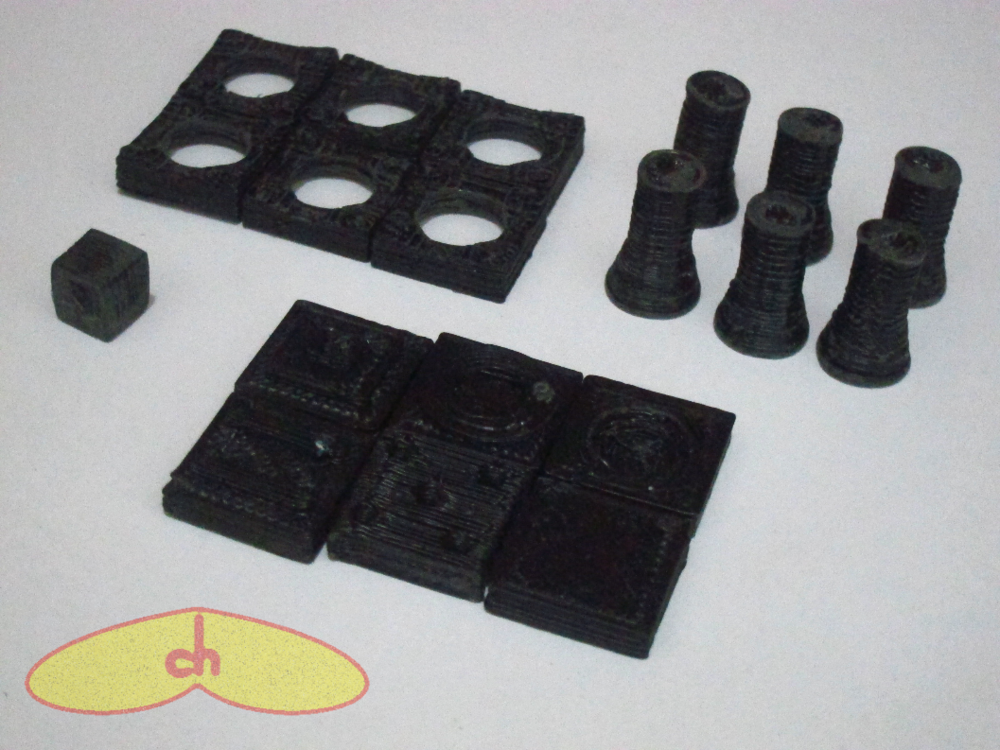
- To put each center together, you will put the core through the inner part (it only enters right one way) and glue the outer part on top of the inner part trapping the core inside the chamber. Be careful not to glue the core to the other parts, or it won’t rotate. If you did it for all 6 centers and they are rotating, you are almost there!
- The core is simply a little cube where all 6 centers will be glued to. Be very careful with the core, it is tiny and the makerbot’s resolution doesn’t make a cube as even as desired (for me at least). You’ll want it to be as even as possible, so your cube rotates well (mine was initially bent and one of the faces didn’t rotate nicely). First, to check if everything is ok, glue two adjacent centers (make sure they go along the whole cube’s pattern arrangement) to the core as in the picture and try to fit an edge through them. If it enters without effort and gets trapped by the center caps, your cube is doing well. Glue all the other centers to the core, being careful with the arrangement of the patterns (check the corners and edges for that, and make sure pyramid is the opposite to stripes, hole is the opposite to plain and circle is the opposite to dots).
- Now you just assemble the cube like in a regular Rubik’s cube. for those who don’t know how to, you can easily find a quick tutorial on youtube.
And now you got your fully printed patterned cube!
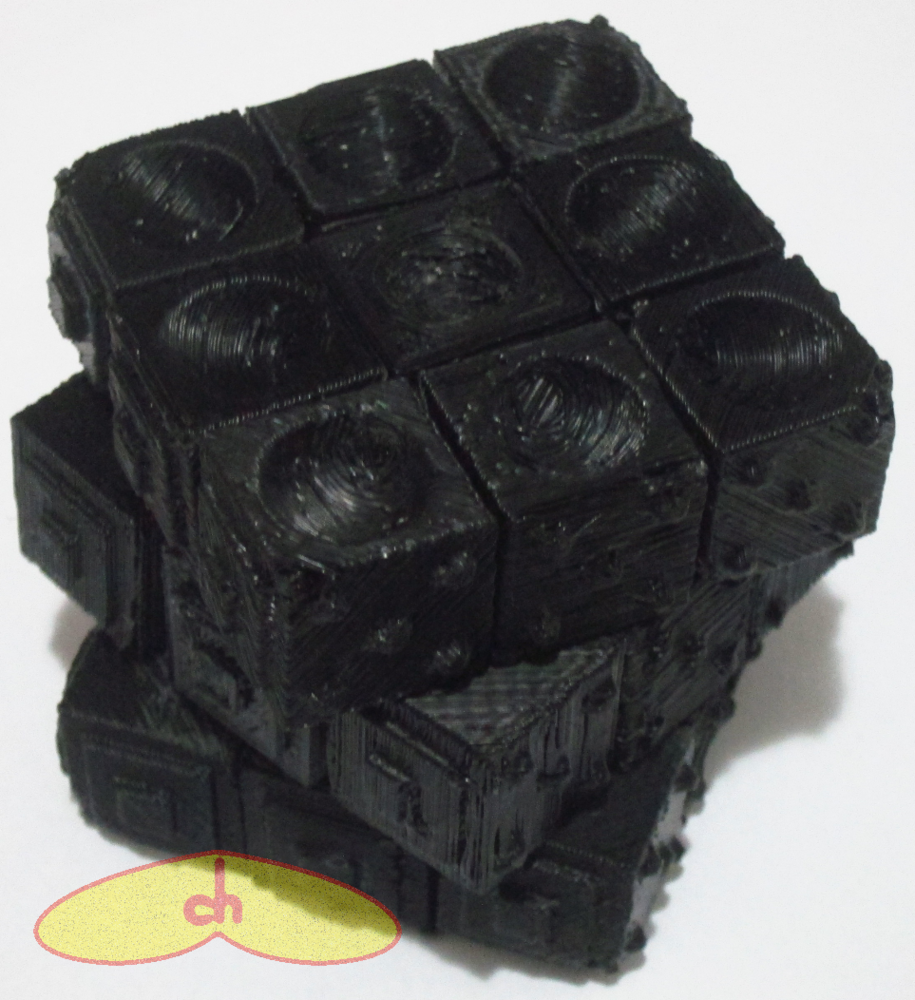
UPDATE: I’ve been playing with it for a while now, and it moves ok. Gets stuck sometimes and if you don’t handle it gently some pieces might pop out. Some of my friends said I should make it tighter, but I’m afraid it will be even more difficult to move since the pieces don’t slide perfectly over each other, so I’ll leave it as it is for now.
It’s interesting to solve it blindfolded because you don’t need to turn the cube around to see what’s the pattern on the back, you just feel it. I can imagine that a well made cube featuring both colors and high relief could be of some advantage for a properly trained cuber (but not legal in real competitions ;P yet… hehe)

That is awesome!
Hi,
I 3D printed your design and the pieces are so loose the rubik’s cube doesn’t stay together at all… I manage to put it all together and when I actually pick it up it instantly falls apart…
Any advice on how to solve this or should I modify your design and try again? 😦
Hello Alice,
Awesome that you’ve printed the cube! I’m sorry it turns out loose, I designed it for my specific printer, which has a bad resolution, so I needed to leave space between the parts to make them fit.
You could try sanding the cores to make the whole cube tighter. Make sure you get all 6 of them to be the same size in the end. Let me know if it works…
Cheers